
Wood Restore PRO ultimate guide
The Ultimate Guide to Hardwood Floor Repair
- Product families
- Wood Restore PRO
- Designed for
- HomeownersRentersDIY beginners

Quick answer
What this guide will help you do
- Separate stable localized damage from active moisture, movement, infestation, rot or structural failure.
- Match scratches, gouges, chips, burns, stains, holes and deep voids to the closest hardwood-floor guide.
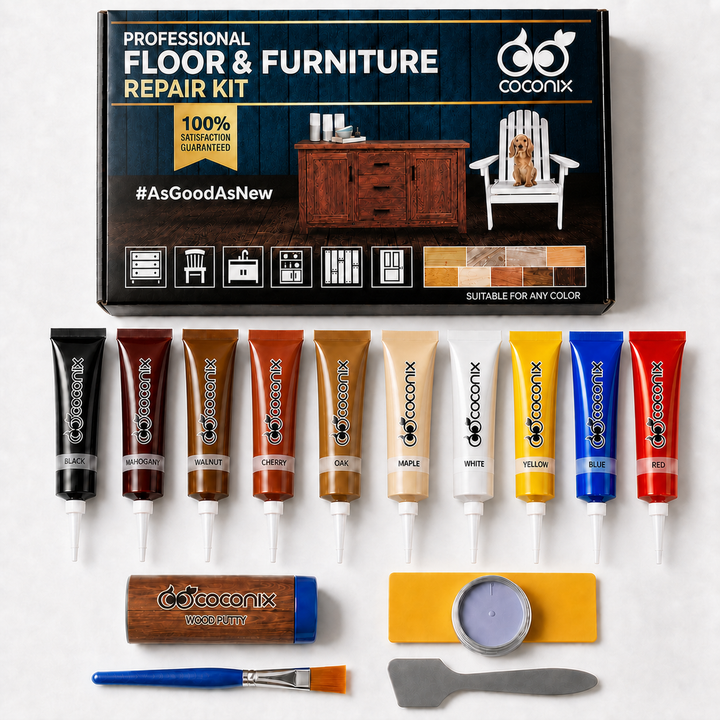
- Use the Floor & Furniture Repair Kit epoxy putty where a stable deep void needs strong structural filling.
- Compare equal repair scopes, then improve the blend through color testing, grain detail and controlled drying.
Start here
Hardwood floor repair: start with the right diagnosis
A damaged hardwood floor does not automatically need replacement. The right response depends on whether the problem is limited to the finish or wood surface, extends into a localized void, or signals movement, moisture or structural failure.

Visual damage guide
How to identify hardwood-floor damage
Group the damage by what you can see before choosing a repair.
Scratches and scuffs
Surface marks and worn finish
Chips, dents and voids
Localized material loss
Moisture, movement or pests
Underlying warning signs
Damage assessment
Can you repair the hardwood floor yourself?
DIY suitability is determined by stability and cause. Localized damage can include missing material and deep voids when the surrounding floor is sound.
DIY fit
Localized floor damage that usually fits DIY
Inspect first
Pause and assess the underlying problem first
Benefits
Why a DIY repair can make sense
Expectations
What a convincing repair requires
Cost comparison
How much does hardwood floor repair cost?
For planning purposes, a localized DIY repair may cost $19–$50. Professional hardwood-floor repair may range from $250–$3,000 in the US, €70–€1,710 in Europe and £70–£1,600 in the UK; exact quotes depend on material, area, damage depth and work required.
Coconix method
DIY localized repair
- USD
- $19–$50
- Best for
- Stable localized scratches, chips, dents or small missing areas where the floor and subfloor are dry and stable.
- Time or difficulty
- Usually one repair session plus drying time; color, grain and finish matching control the difficulty.
- Tradeoffs
- Lower cash outlay, but the user controls diagnosis, preparation, filling, color, grain, level and finish.
Includes one current $19.95 Coconix kit plus optional basic application materials for a localized repair.
Professional service
Professional hardwood floor repair
- USD
- $250–$3,000
- EUR
- €70–€1,710
- GBP
- £70–£1,600
- Best for
- Broad damage, board movement, active moisture, structural uncertainty, historic value or work that requires sanding, replacement or subfloor access.
- Time or difficulty
- Service time varies from a localized visit to multi-day board replacement, sanding or refinishing.
- Tradeoffs
- Higher cash outlay, but specialist assessment and equipment are valuable when the repair scope extends beyond a stable localized surface.
Varies with the affected area, damage depth, access, wood species and whether boards or the subfloor require work.
Product guide
Which Coconix product fits hardwood-floor damage?
The Coconix Floor & Furniture Repair Kit is the primary system for stable, localized hardwood-floor damage.

Visual method finder
Find the right hardwood and wood-floor repair method
Choose the card that matches the material and damage. Each card opens a Coconix How-to article with the complete method, supplies, and explanations.


Quality check
How to evaluate a finished hardwood floor repair
Judge the result after it has dried or cured, using the room’s normal light and viewing angle.
Color match
Test the color before the visible repair
Grain detail
Recreate the grain with fine detail
Color guidance
Use photo support when the color is uncertain
If the result does not look right
Hardwood-floor repair troubleshooting
Pause before adding more product and identify whether the issue is color, surface level or an underlying cause.
Why does my hardwood-floor repair look too light, dark or flat?
- Likely cause
- The base color was judged while wet or under different light, the undertone is off, or the repair has a uniform color without the darker or lighter grain detail found in the surrounding wood.
- What to do
- Compare a fully dry test with an undamaged nearby board or furniture area in normal light. Adjust one color in a small amount, mix thoroughly and dry-test again. Once the base matches, use a fine brush and the approved wood method to add restrained grain lines that follow the surrounding direction; evaluate the result at normal viewing distance before adding more detail.
Why does my hardwood-floor repair look raised, sunken or sharply outlined?
- Likely cause
- Too much filler, insufficient fill in a stable void, shrinkage before full cure, an abrupt color boundary, or missing grain detail is catching the light.
- What to do
- For a raised cured repair, use fine-grit sandpaper with gentle pressure only when the original surface and finish safely accept sanding; do not sand laminate wear layers, delicate veneer or thin factory finishes. For a stable low spot, return to the matching fill method and build only to the surrounding level. For an outline, match the base color first, keep the blend boundary small and recreate the surrounding grain after the color dries.
What should I do if hardwood-floor damage returns or the floor keeps moving?
- Likely cause
- Active moisture, seasonal or subfloor movement, a loose board or joint, an unsupported deep void, renewed impact, or active pest damage is changing the repaired area.
- What to do
- Check whether the wood is dry, firm and stationary. Correct the moisture source or mechanical movement first. On stable localized deep damage, rebuild missing material with the kit’s epoxy-putty method, allow it to cure, level only if the original finish safely permits it, then restore base color and grain with the matching How-to. For pest damage, begin only after the infestation is confirmed inactive.
- Stop or get help when
- Use professional assessment for persistent dampness, buckling, cupping, rot, widespread floor movement, active infestation, a load-bearing failure, or wood that remains soft or unstable after the source is addressed.
Customer results
Hardwood floor repair before-and-after examples
These customer review images show real Floor & Furniture repairs across scratches, chips, cracks, holes and missing material.

Chips and cracks

Holes and missing material

Scratches and scuffs
Care and prevention
How to protect a repaired hardwood floor
Prevention works best when it controls the cause of damage: grit, moisture, furniture pressure and unnoticed wear.
01
Control grit and abrasion
02
Stop moisture at the source
03
Protect furniture contact points
04
Inspect the repair in normal light
Coconix repair solutions
Products featured in this guide
Match the product to the material, damage and size of the repair.
Clear answers
The Ultimate Guide to Hardwood Floor Repair: frequently asked questions
Can a damaged hardwood floor be repaired without replacing the boards?
Can the Coconix Floor & Furniture Repair Kit fill deep hardwood-floor damage?
How do I choose a color for a hardwood-floor repair?
When should hardwood-floor damage be professionally assessed?
Continue learning
