The Ultimate Guidebook for Repairing Wooden Furniture

The Ultimate Guidebook for Repairing Wooden Furniture

 
Before & After Repair Result Photos


There is no corner in every one's home that doesn’t suit the warmth, comfort, coziness, and elegance of wooden furniture. Aside from being aesthetic and functional, wooden furniture pieces are known for their long lasting durability. These many years of use and exposure to different factors pose a threat to the wood’s durability and intactness. This ultimate guidebook is created to help you deal with the damages on your furniture and keep it lasting for longer years. 

1. To Do It Yourself or To Hire? Let's determine the Damage

Before anything else, you need to know whether you can DIY repair the damage (and invest time and effort) or if you should hire a furniture professional (and spend a chunk of money). If your damage fits into the DIY repairable category then you’re in luck! We can provide you a number of different ways to affordably repair your damage. Unfortunately, if you’re on the other side and your damage is a bit more severe, we recommend that you seek the help of a professional. 

DIY repairable damages

 Non-DIY repairable damages

Surface scratches and scuffs Pet urine and other pet accidents
Wood scrapes and nicks Deforming and warping
Chips and dents Termites
Cracks and gaps
Stain and surface marks
Holes and knots

If you’re still umming and ahhing, our next section provides the wood furniture repair costs based on the wood furniture damage that you have. Our cost table should guide you in making your decision.

2. Wood Furniture Repair Cost

Below is the cost comparison of DIY compared to professional help that we broke down and researched for you. Seeing how much you’ll save might just hit the nail on the head for you!

The cost for professional wood furniture repair may vary depending on the severity of the damage. But for DIY repair of wood furniture, it may only cost you $19.95 for a Coconix wood repair kit or up to $50 for other materials that you might need, especially for more severe damages.

Damage Type

Average Cost of Professional Repair

Average DIY Repair Cost

Scratches $110 - $260 $19.95 - $50
(including repair tools and materials)
Chips and dents $110 - $1,000 $19.95 - $50
(including repair tools and materials)
Cracks and gaps $200 - $1,000

$19.95 - $50
(including repair tools and materials)
Stain and surface marks $75 - $2,000 $19.95 - $50
(including repair tools and materials)
Holes and knots $100 - $2,000 $19.95 - $50
(including repair tools and materials)
Deforming/Warping $225 - $3,000 DIY repair not applicable
Pet urine and other pet accidents $500 - $1,400 DIY repair not applicable
Termites $500 - $3,300 DIY repair not applicable
Source: https://www.fixr.com/

As you may imagine, when the floor damage worsens, the average cost per repair increases. Other wood professionals may charge $25 to $30 per hour plus materials for their services. Professional repair prices for wood furniture repair are fairly reasonable if you are looking for quick, hassle-free repairs. But sometimes we just don’t have the money to spare or you just really like the challenge of doing it yourself!


3. Furniture Repair Markers vs Coconix Wood Repair Kit

As you go over the options for your DIY wood Furniture repair project, we’ve created this section so you can have an idea of what the best furniture restorer is for your woodwork repair.

Wood furniture restoration not only helps the environment (it significantly reduces your carbon footprint), but it also saves you money as compared to having it repaired by professional wood restorers. Our previous section has proved this to be true and wood furniture repair cost surely has brought you to deciding to fix wood furniture by yourself.

Now the question is, what is the best furniture restorer? You might stumble upon many wood refurbishing products online or on your local hardware stores like wood fillers, furniture touch up markers or wood touch up markers, wood repair tapes, wood adhesives, and many more. But based on research, thousands of customer reviews and experiences, and product ratings, the two best furniture restorers are wood repair kits and furniture repair markers.

Let’s find out more about these two furniture repair products and how they compare to each other. In the comparison table below, we have laid out factors to be considered in furniture restoration for beginners and how these two work in each.

Factors to Consider in
Furniture Restoration
For Beginners
 Coconix Wood Repair Kit Furniture Repair Markers
Wood Furniture Repair Cost 
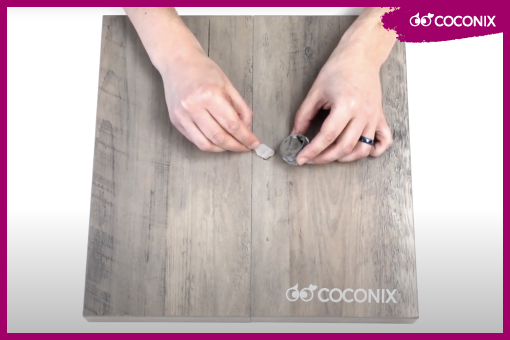
For $19.95, the kit already includes 10 repair compounds for the most common wood colors, wood putty, spatula, applicator brush, mixing jar, and Color Mixing Guide—everything you need in every furniture restoration for beginners. Furniture repair markers cost range from $7 for a one-color wood marker to $36 for a multi-color wood marker set.
Furniture Repair Product User Experience Coconix wood repair kit is specially designed for furniture restoration for beginners. The kit includes a user manual with easy-to-follow instructions. Our wood repair compounds have quick-dry formula and perfect for mess-free application. Furniture repair markers are usually the first option that furniture restoration beginners try so it is known to be beginner-friendly.
Wood Scratch Repair Coconix wood repair kit is formulated to provide the best wood scratch repair. Wood scratches usually occur across wood grain patterns. Coconix wood repair kit has the most common wood colors that can be mixed to match and recreate any wood grain patterns and colors. Furniture repair markers are considered to be a quick fix for wood scratches. Markers can be used just like a pen to trace a wood scratch but it can be tricky when blending the traced scratch with the rest of the wood areas. Though it has a wood finish, wood pen markers usually look like a marker ink traced along the scratch, especially for repairs on a grained or patterned wood.
Wood Chip Repair Coconix wood repair kit already includes a wood putty that can be used to fill chips larger than ¼ of an inch. Then, the colored repair compounds can be applied over the cured putty to blend the repaired spot with the rest of the area. For minor chips, the Coconix repair compounds are sufficient to fix it. The Coconix repair compounds are not only paint, but it also contains wood adhesive, dries to a wood-like finish and often outlives the actual wood material. Furniture repair markers can be used on wood chips to keep it from being an eyesore. However, it will not truly fill in the damage but it will cover it.
Wood Dent Repair Similar to chips on wood, wood dents can be easily repaired using Coconix wood repair kit. Dents can be covered up by furniture repair markers, but we wouldn’t say that it is really fixed.
Screw Hole Repair Screw holes are often eyesore on spots that are exposed and Coconix wood repair can be used to fill the hole and blend the repair. Furniture repair markers are not designed to repair holes as they can only repair surface scratches, stains and marks.
Wood Table Restoration Wood table restoration usually involves repairing table top scuffs, stains, scratches, and dents. Coconix wood repair kit can fix all those types of damages and is 100% safe to use on dining and coffee tables. Furniture repair markers can be used on tabletop scratches, stains, surface scuffs, and minor dents.
Wood Chair Repair Coconix wood repair kit is suitable for wood chair repairs—from chair scratches to pet chew marks on chair legs. Since wood chair repairs usually involve deeper dents, furniture repair markers are not ideal for use.
Wood Cabinet Restoration Wood cabinet restoration is one of the most common projects of Coconix users. Since Coconix wood repair kit includes all materials that you might need in a wood cabinet restoration, this project is a breeze with Coconix. If you’re looking to restore wood cabinet, furniture repair markers might not be your best choice since this product is meant for surface damages on small areas.
Restoring Antique Furniture Restoring antique furniture often includes repairing cracks, gaps, and discoloration. Coconix wood repair kit can definitely fix these damages in easy steps. Plus, our Coconix Support team can provide unlimited personalized advice on your antique furniture restoration project. If you’re looking to hide the wear marks of years of usage of your antique furniture, then you can bet on furniture repair markers. But for more severe damages on old furniture pieces, furniture repair markers are not the best repair product.


Using the factors that we have listed above in relation to furniture restoration for beginners, we hope that you found the best furniture restorer. Coconix wood repair kit is a versatile furniture repair product that can be used on many wooden furniture damages and wooden furniture repair projects.


4. Wood Furniture Repair Step-by-Step Instructions

A. Wood Scratch, Scuff, Stain, Marks, Discoloration Repair

DIFFICULTY: Easy to Moderate
STEPS:
4
TIME REQUIRED:
45 minutes - 2 hour

INTRODUCTION:

This guide will assist in repairing the most common damages.on wooden furniture:

  • Wood Scratch Repair
  • Wood Scuff Repair
  • Wood Stain Repair
  • Wood Marks Repair
  • Wood Discoloration Repair


The repair steps below include an easy-to-use and inexpensive wood repair kit and other materials you will need along the way. If you’re feeling stuck and don’t know how to start, please don’t hesitate to contact us and send us clear photos of your repair project. We’d love to help you all throughout your repair!

TOOLS:

  • Microfiber cloth
  • Wood repair kit:
    • Wood putty
    • Colored repair compound
    • Brush
    • Mixing jar
    • Spatula
  • Fine brush (if the included brush in the kit is not refined enough)
  • Paper towel

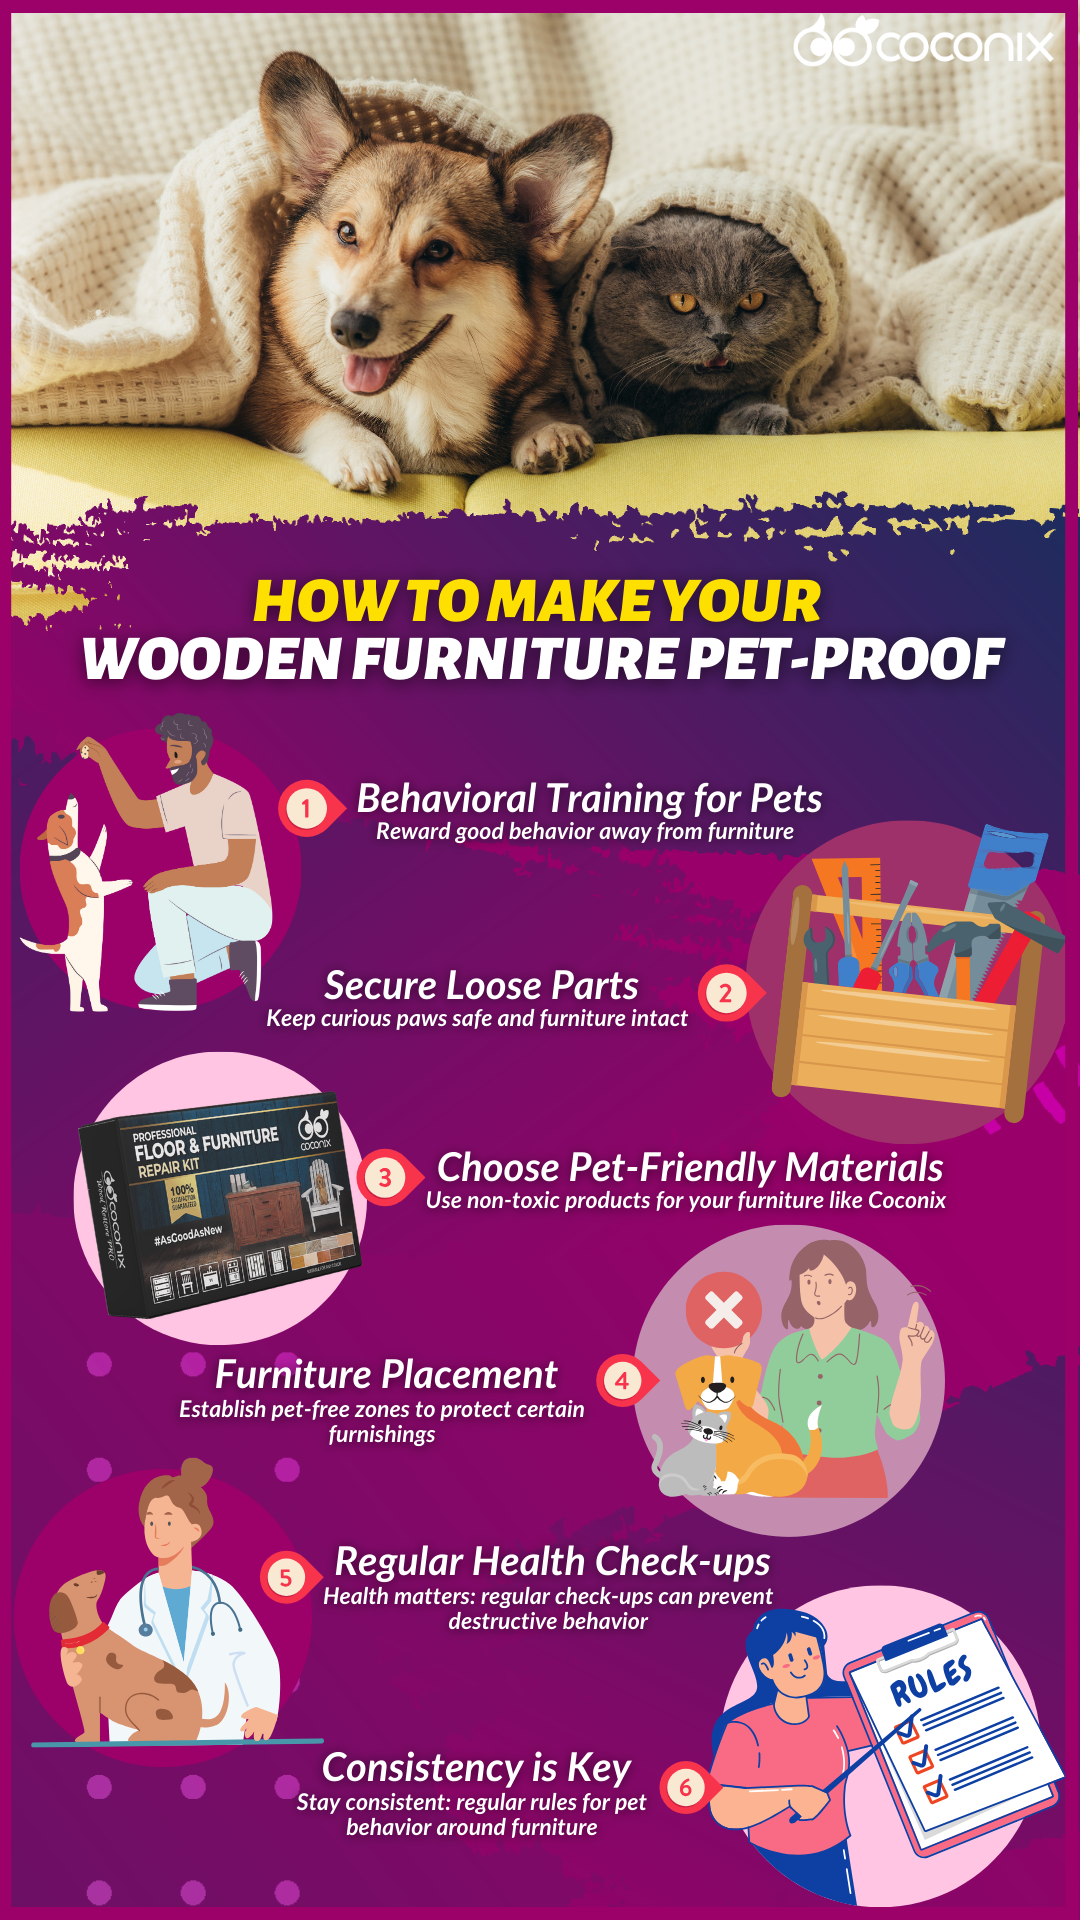
Step 1: CLEAN AND WIPE THE AREA TO BE REPAIRED.

Start by cleaning the damaged area and removing any debris. Wipe it down with a damp cloth and let it dry thoroughly. 

Step 2: MIX, MATCH, AND RECREATE GRAIN PATTERNS

Mix your colors to match the color of your wood. There are wood furniture pieces that have grains and patterns so you will also need to recreate these to completely blend the area. Refer to the next section for the color matching and grain pattern creation.

Step 3: APPLY THE REPAIR COMPOUND

Apply the repair compound to the damaged area. Use the spatula for larger applications and the brush for surface applications and detail touch ups. Use a fine brush of your preference if the brush in the kit is too big for details and grain pattern creation. Smooth out the surface and wipe off the excess with a paper towel.

Step 4: ALLOW THE REPAIR TO DRY

Allow several hours to dry until the repair compound is no longer sticky to touch. If needed, apply additional layers until the repaired area is flush with the rest.

B. Wood Crack, Chip, Dent, Hole Repair

DIFFICULTY: Moderate to Hard
STEPS:
6
TIME REQUIRED:
1 hour - 6 hours

INTRODUCTION:

This guide will help you complete any of the following repairs on wooden furniture:

  • Wood Hole Repair
  • Wood Crack Repair
  • Wood Chip Repair
  • Wood Dent Repair

The repair steps are beginner-friendly so there’s nothing to worry about if this is your first repair project! If you’re feeling stuck and don’t know how to start, please don’t hesitate to contact us and send us clear photos of your repair project. We’d love to help you all throughout your repair!

Tools and materials needed:

  • Microfiber cloth
  • Thin-tip splinter tweezers
  • Sandpaper
  • Wood repair kit:
    • Wood putty
    • Colored repair compound
    • Brush
    • Mixing jar
    • Spatula
  • Paper towel

Step 1: PREPARE BY CLEANING AND REMOVING CHIPS AND SPLINTERS

Prepare the damaged area by carefully removing any paint chips and wood splinters. Clean the area and remove any debris. Wipe it down with a damp cloth and let it dry thoroughly.

Step 2: USE THE PUTTY TO FILL ANY GAPS WIDER AND DEEPER THAN ¼ OF AN INCH

For damaged corners, gaps, or holes wider and deeper than 1/4 of an Inch, first use the wood putty to fill the gap. Cut off the required amount of wood putty and knead it to a uniform color. Apply within 2 minutes after kneading. Press the putty firmly until curing is noticeable. Please do not leave a bulge. For a smooth surface, rub the area with a damp cloth prior to hardening. After 1 hour, the wood putty can be sanded, tapped and drilled.

Step 3: MIX YOUR COLORS TO MATCH YOUR WOOD

Mix your colors to match the color of your wood. There are wood furniture pieces that have grains and patterns so you will also need to recreate these to completely blend the area. Refer to the next section for the color matching and grain pattern creation.

Step 4: APPLY THE REPAIR COMPOUND

Apply the repair compound to the damaged area. First, apply it along the edges and work from the outside to the center to avoid air bubbles. Use the spatula for larger applications and the brush for surface applications and detail touch ups. Smooth out the surface and wipe off the excess with a paper towel.

Step 5: ADD LAYERS OF REPAIR COMPOUND AS NEEDED

Apply multiple layers of the repair compound as needed. There are repairs that may require several thin layers to build up the damaged area. Don’t forget to allow dry time between applications.

Step 6: ALLOW THE LAYERS TO DRY IN BETWEEN APPLICATION

Allow several hours to dry until the final layer of the repair compound is no longer sticky to touch. If further needed, apply additional layers until the repaired area is flush with the rest.

C. Match Wood Color and Create Grain Pattern

DIFFICULTY: Easy to Moderate
STEPS: 4
TIME REQUIRED: 15 - 45 minutes

INTRODUCTION:

One of the most important things you should be able to do correctly in a DIY wood repair project is the color matching part. Wood furniture varies in type, finish, styles, color, and a lot more. We’ve listed some helpful color matching tips you could use when doing your DIY wood repair project.

Step 1: KNOW YOUR BASE COLOR

Most wood materials used in wood furniture have grain and patterns on them. Because of these grains and patterns, we would usually overlook the real base color of our wood. Knowing the true base color of your wood will definitely help you in creating your base color mixture. With Coconix, you can definitely mix two or more colors to get the perfect color match of your wood. You will also be able to use just one color straight from the kit if your wood color is one of the most common ones like walnut, mahogany, maple, oak, and cherry.

Step 2: BEFRIEND YOUR COLOR CHART

You might have a difficult time mixing and matching if you do not understand how the color chart included in your wood repair kit works. While reading this portion, it’s best to have your wood color chart ready with you!

On the Color Mixing Guide portion of your repair kit manual, you will see colors with labels on the left side and colors with labels on the bottom part. Look for the best base color match of your wood furniture across the colors on the grids. Once you have found the perfect color match, follow the grid on a horizontal line to the left to know your main color. Then, follow the grid in a vertical line to the bottom to look up your secondary color. There are times that you would only need one color, especially when your wood furniture perfectly matches one of the repair compounds in the kit. You will see the meaning of the color labels at the bottom portion where the color legends are indicated. Your Color Mixing Guide also has easy instructions if ever you get confused along the way. On the lower right corner of your Color Mixing Guide is where you will find how to contact us in case you need further help with color matching.

Step 3: ADJUST YOUR COLOR MIXTURE

When mixing your base color, you will have to use the two key colors in wood color matching: Black and White. These two repair compound colors will help you adjust the tint of your base color mixture. It is also very important to remember that you only have to add tiny amounts of black or white at a time. BE REMINDED, A LITTLE AMOUNT GOES A LONG WAY!

Step 4: PRACTICE YOUR PATTERN

After getting the perfect color mixture for your wood base color, you will have to practice doing the grains or patterns on your wood. Most of the wood patterns can be recreated by using Mahogany, Walnut or Black. Of course, it will still depend on your wood pattern’s color so you must identify which perfectly matches its color. Then, you may try doing the pattern using the brush included in the kit. Don’t be afraid to experiment on this step. The more you practice, the more you’ll be familiar with your wood’s grain or pattern and how to perfectly copy it. The saying “practice makes perfect” never gets old.

5. Wood Furniture Restoration Step-by-Step Instructions

Below are several wood furniture restoration projects that you can use as your guide and we have included step-by-step instructions so you can easily follow through. Any repair bumps you encounter, you can contact our Coconix Support Team right away.

A. Wood Table Restoration

SECTION:
Scratched or Discolored Wood Table (3 steps)

Wood Table with Chips, Chew Marks, And Nail Or Screw Holes (4 steps)

Scratched or Discolored Wood Table
DIFFICULTY: Easy
STEPS: 3
TIME REQUIRED: 30 - 45 minutes

INTRODUCTION:
Wood table restoration often involves tabletop scratches, surface scuffs, spill marks, stains, discoloration, and dents.

For these types of wood table damage, you can follow the guide below for easy wood table restoration.

TOOLS:

  • Microfiber cloth
  • Wood repair kit:
    • Wood putty
    • Colored repair compound
    • Brush
    • Mixing jar
    • Spatula
  • Fine brush (if the included brush in the kit is not refined enough)
  • Paper towel


Step 1: CLEAN THE TABLETOP

Start by cleaning the damaged area and removing any debris. Wipe it down with a damp cloth and let it dry thoroughly.

Step 2: APPLY A THIN LAYER

Apply the repair compound to the damaged area. Use the spatula for larger applications and the brush for surface applications and detail touch ups. Use a fine brush of your preference if the brush in the kit is too big for details and grain pattern creation. Smooth out the surface and wipe off the excess with a paper towel.

Step 3: LET THE TABLETOP AIR DRY BEFORE REUSING

Allow several hours to dry until the repair compound is no longer sticky to touch. If needed, apply additional layers until the repaired area is flush with the rest.

Wood Table with Chips, Chew Marks, And Nail Or Screw Holes


DIFFICULTY: Easy
STEPS: 4
TIME REQUIRED: 30 minutes - 1 hour

INTRODUCTION:
For dents, chips, chew marks, and nail or screw holes on wood tables, wood hole filler or screw hole fillers usually are needed. Good thing, Coconix wood repair kit already includes a wood putty stick that you can use to fill these table damages.

Follow the guide below for easy wood table restoration that requires wood hole fillers.

TOOLS:

  • Microfiber cloth
  • Wood repair kit:
    • Wood putty
    • Colored repair compound
    • Brush
    • Mixing jar
    • Spatula
  • Fine brush (if the included brush in the kit is not refined enough)
  • Paper towel
  • Thin-tip splinter tweezers
  • Sandpaper

Step 1: PREPARE THE DAMAGED AREA OF THE TABLE

Prepare the damaged area by carefully removing paint chips and wood splinters using thin-tip splinter tweezers. Clean the area and remove any debris. Wipe it down with a damp cloth and let it dry thoroughly.

Step 2: FILL THE DAMAGE WITH WOOD PUTTY


For damaged corners or holes wider and deeper than 1/4 of an Inch, first use the wood putty to fill the gap. Cut off the required amount of wood putty and knead it to a uniform color. Apply within 2 minutes after kneading. Press the putty firmly until curing is noticeable. Please do not leave a bulge. For a smooth surface, rub the area with a damp cloth prior to hardening. After 1 hour, the wood putty can be sanded, tapped and drilled.

Step 3: APPLY THE REPAIR COMPOUND OVER THE AREA

Apply the repair compound to the damaged area. First, apply it along the edges and work from the outside to the center to avoid air bubbles. Use the spatula for larger applications and the brush for surface applications and detail touch ups. For deeper holes and cracks, multiple layers might be needed. We recommend allowing dry time between each layer application. Smooth out the surface and wipe off the excess with a paper towel.

Step 4: LET DRY BEFORE REUSING

Allow several hours to dry until the repair compound is no longer sticky to touch. Make sure that the repaired spot of the table is protected from being touched or ruined.

If your wood table restoration requires a more customized repair instruction, don’t hesitate to request repair advice from our Coconix repair experts.

B. Wood Chair Restoration

Wood chair restoration usually means repairing cracks, dents, or chew marks on the back rest or the legs of the wood chair. 

Follow the wood chair restoration guide below and contact us for any questions.

Tools and materials needed:

  • Microfiber cloth
  • Thin-tip splinter tweezers
  • Sandpaper
  • Wood repair kit:
    • Wood putty
    • Colored repair compound
    • Brush
    • Mixing jar
    • Spatula
  • Paper towel

Step 1: CLEAN THE DAMAGED PART OF THE CHAIR

Prepare the area by carefully removing paint chips, splinters and debris. Wipe down the area with a damp cloth and let it dry thoroughly. 

Step 2: FILL THE CRACKS, DENTS OR CHEW MARKS

For cracks or chips wider and deeper than 1/4 of an Inch, first use the wood putty to fill the gap. Cut off the required amount of wood putty and knead it to a uniform color. Apply within 2 minutes after kneading. Press the putty firmly until curing is noticeable. Do not leave a bulge. For a smooth surface, rub the area with a damp cloth prior to hardening. After 1 hour, wood putty can be sanded, tapped and drilled. 

Step 3: APPLY AND BLEND THE REPAIRED SPOT

Apply the repair compound to the damaged area. Since these types of wood chair damages usually stand out, we recommend blending the repaired spot by color matching and recreating any grain patterns on your wood chair. Contact our support for color matching and wood grain recreation advice. Use the spatula for larger applications and the brush for surface applications and detail touch ups. Smooth out the surface and wipe off the excess with a paper towel.

Step 4: SET ASIDE THE CHAIR TO DRY

Allow several hours to dry before reusing. Make sure that the repair compound is no longer sticky to touch. 

For other types of wood chair restoration, contact our repair experts for personalized repair advice.

C. Wood Cabinet Restoration

Wood cabinet restoration typically includes restoring faded color, filling holes with missing nails or screws, and fixing cracks and dents. 

For movable cabinets, we recommend doing the repair on a spacious area with air to help the repair compound dry. For installed cabinet repairs, we recommend allowing air through doors and windows for quicker dry time. Also, if the installed cabinet is in a spot where sunlight does not reach it, please make sure to have a clear lighting for better color matching and blending of the repair. Follow the wood cabinet restoration steps applicable for most wood cabinet restoration projects.

Tools and materials needed:

  • Microfiber cloth
  • Thin-tip splinter tweezers
  • Sandpaper
  • Wood repair kit:
    • Wood putty
    • Colored repair compound
    • Brush
    • Mixing jar
    • Spatula
  • Paper towel

Step 1: CLEAN THE DAMAGED PART OF THE CABINET

Prepare the area by carefully removing paint chips, splinters and debris using a thin-tip splinter tweezers. Wipe down the area with a damp cloth and let it dry thoroughly. 

Step 2: FILL THE CRACKS, DENTS OR CHEW MARKS


If you are only restoring faded color on wood cabinets, you may skip this step.

For cracks or chips wider and deeper than 1/4 of an Inch, first use the wood putty to fill the gap. Cut off the required amount of wood putty and knead it to a uniform color. Apply within 2 minutes after kneading. Press the putty firmly until curing is noticeable. Do not leave a bulge. For a smooth surface, rub the area with a damp cloth prior to hardening. After 1 hour, wood putty can be sanded, tapped and drilled. 

Step 3: APPLY AND BLEND THE REPAIRED SPOT

Apply the repair compound to the damaged area. It’s always best to blend the repaired spot by color matching and recreating any grain patterns on your wood cabinet. Maintain a good lighting, preferable natural lighting, in your woodwork area to assure a more accurate color mixture. Natural lighting will help you take good pictures of the repair area which is a must if you’re going to contact our support for color matching and wood grain recreation advice.

Use the spatula for larger applications and the brush for surface applications and detail touch ups. Smooth out the surface and wipe off the excess with a paper towel.

Step 4: LET IT AIR DRY

Allow several hours to dry before reusing. Using a hot blower to dry the repaired spot is not recommended as using heat is not suitable for Coconix wood repair kit. Letting the repair air dry is always the best. Make sure that the repair compound is no longer sticky to touch. 

D. Wood Laminate Restoration

Wood laminate restoration is a project that usually involves repairing shelves and customized or installed home furniture made out of wood laminate. Though wood laminate is know for its durability and resistance to heat and scratches, it is not completely vulnerable to damages especially since wood laminate furniture is usually found in the busy areas of a house or areas where it might get a lot of heavy use. The usual damage wood laminate furniture gets is a dent or chip.

Below is your easy guide to wood laminate restoration. For questions, let us know and we’d love to help you out.

Tools and materials needed:

  • Microfiber cloth
  • Thin-tip splinter tweezers
  • Sandpaper
  • Wood repair kit:
    • Wood putty
    • Colored repair compound
    • Brush
    • Mixing jar
    • Spatula
  • Paper towel

Step 1: CLEAN AND PREPARE THE SPOT

Prepare the area by carefully removing paint chips, splinters and debris. Wipe down the area with a damp cloth and let it dry thoroughly. 

Step 2: FILL DEEP DENTS WITH WOOD PUTTY 

If the dent or chip on your wood cabinet is minimal, you may skip this step.

For cracks or chips wider and deeper than 1/4 of an Inch, first use the wood putty to fill the gap. Cut off the required amount of wood putty and knead it to a uniform color. Apply within 2 minutes after kneading. Press the putty firmly until curing is noticeable. Do not leave a bulge. For a smooth surface, rub the area with a damp cloth prior to hardening. After 1 hour, wood putty can be sanded, tapped and drilled. 

Step 3: APPLY AND LET DRY

Apply the repair compound to the damaged area. First, apply it along the edges and work from the outside to the center to avoid air bubbles. Use the spatula for larger applications and the brush for surface applications and detail touch ups. Smooth out the surface and wipe off the excess with a paper towel. Make sure to allow the spot to dry before reusing the furniture.

E. Antique Wood Restoration

When we talk about antique wood restoration, we’re also talking about years of wear and tear, maybe decades of usage, and thousands of people, animals, or objects that might have scuffed the antique wood furniture.

Antique wood restoration can be a breeze especially with Coconix wood repair kit. Follow the Coconix repair guide below in restoring your antique wood furniture. 

Tools and materials needed:

  • Microfiber cloth
  • Thin-tip splinter tweezers
  • Sandpaper
  • Wood repair kit:
    • Wood putty
    • Colored repair compound
    • Brush
    • Mixing jar
    • Spatula
  • Paper towel

Step 1: CAREFULLY CLEAN AND PREPARE THE ANTIQUE FURNITURE

Prepare the area by carefully removing paint chips, splinters and debris. Wipe down the area with a damp cloth and let it dry thoroughly. 

Step 2: FILL DEEP DAMAGES WITH WOOD PUTTY 

If the damage on your antique wood furniture is on the surface, you may skip this step.

For cracks or chips, holes, dents, or gaps wider and deeper than 1/4 of an Inch, first use the wood putty to fill the gap. Cut off the required amount of wood putty and knead it to a uniform color. Apply within 2 minutes after kneading. Press the putty firmly until curing is noticeable. Do not leave a bulge. For a smooth surface, rub the area with a damp cloth prior to hardening. After 1 hour, wood putty can be sanded, tapped and drilled. 

Step 3: APPLY THE COMPOUND AND RECREATE GRAINS OR PATTERNS

Apply the repair compound to the damaged area. First, apply it along the edges and work from the outside to the center to avoid air bubbles. Antique wood furniture pieces are know for having intricate designs and patterns. Coconix wood repair kit includes repair compounds that can be mixed to match your wood color and recreate any grain patterns. Use the spatula for larger applications and the brush for surface applications and detail touch ups. Smooth out the surface and wipe off the excess with a paper towel. If you need help with color matching, contact our repair experts for advice at no charge.

Step 4: SET ASIDE THE FURNITURE TO DRY

Place your antique furniture on an area with flowing air and allow several hours to dry before reusing. Make sure that the repair compound is no longer sticky to touch. If the furniture is too heavy to be moved, make sure to allow air to flow inside the house so the spot can air dry before reusing the furniture.

For a more personalized repair instructions, send us clear pictures of your antique furniture and our Coconix Support Team would be happy to assist you.


6. Before & After: Repair Result Photos

The following images and testimonies from Coconix Shop on Amazon will help you believe that DIY wood repair can be easy, fun, and possible! The results will truly amaze you and will surely give you confidence in starting your own DIY wood repair project.


Coconix DIY Wood Repair Before And After


7. BONUS: HOW TO MAKE YOUR WOODEN FURNITURE PET-PROOF

How To Make Your Wooden Furniture Pet-Proof


8. CONCLUSION: The Best Furniture Restorer

DIY wood repair can be a piece of cake with the right tools and materials, the right wood repair kit, and this ultimate guidebook, you will surely get the repair results you are looking for. And the most important thing is that you have our Coconix Support Team to assist you and to answer any questions that you may have before, during, and after your repair project.


9. Frequently Asked Questions on DIY Repair

We know that you might still have a few questions in mind you would like to be addressed. In this section, we have laid these questions out to clear them up in your mind. 

What are the Skills Needed?

Scratches, chips, cracks, holes are some of the easiest damages to fix! Any DIYer can tackle this task!

Repair Skill Level Required

Problem

DIY Beginner

DIY Intermediate

DIY Pro

Wood Professional

Scratches
Chips and dents
Cracks
Stain and surface marks
Holes and knots
Burns
Warping
Water damage
Pet Urine
Mold and Rot
Termite damage


What Tools are Needed for Each Type of Damage?

We prepared this section to help you get everything you need for your repair!

Scratches And Marks

Repair Skill Level Required: DIY Beginner
Tools/Materials Needed:
  • DIY Wood repair kit that must contain:
    • Wood putty
    • Colored repair compound
    • Applicator or brush
Other materials you may need:
  • Sandpaper
  • Cloth or rag
  • Varnish or clear lacquer (for polishing)
  • Steel wool (for matte wood finish)
wood scratch

 Stains And Discolorations

Repair Skill Level Required: DIY Beginner - DIY Pro
Tools/Materials Needed:
  • DIY Wood repair kit that must contain:
    • Wood putty
    • Colored repair compound
    • Applicator or brush
Other materials you may need:
  • Sandpaper
  • Cloth or rag
  • Varnish or clear lacquer (for polishing)
  • Steel wool (for matte wood finish)
Wood Stains and Discoloration

 Dents, Cracks, Gaps, And Chips

Repair Skill Level Required: DIY Beginner - DIY Intermediate
Tools/Materials Needed:
  • DIY Wood repair kit that must contain:
    • Wood putty
    • Colored repair compound
    • Applicator or brush
Other materials you may need:
  • Sandpaper
  • Cloth or rag
  • Varnish or clear lacquer (for polishing)
  • Steel wool (for matte wood finish)
Wood Dents and Cracks

 Holes and Knots

Repair Skill Level Required: DIY Beginner - DIY Intermediate
Tools/Materials Needed:

  • DIY Wood repair kit that must contain:
    • Wood putty
    • Colored repair compound
    • Applicator or brush

Other materials you may need:

  • Sandpaper
  • Cloth or rag
  • Varnish or clear lacquer (for polishing)
  • Steel wool (for matte wood finish)
Wood Holes and Knots

 Burns

Repair Skill Level Required: DIY Intermediate - DIY Pro
Tools/Materials Needed:

  • DIY Wood repair kit that must contain:
    • Wood putty
    • Colored repair compound
    • Applicator or brush

Other materials you may need:

  • Sandpaper
  • Cloth or rag
  • Varnish or clear lacquer (for polishing)
  • Steel wool (for matte wood finish)
Wood Burn

 Pet Accidents

Repair Skill Level Required: Floor repair professional
Tools/Materials Needed:
Minor pet damage to can be repaired by removing the urine and slowly drying the boards using the following materials.
  • Shop vacuum
  • Squeegee
  • Stiff brush
  • Bucket
  • Rubber gloves
  • Absorbent cloth
  • Mild detergent or disinfectant
Wood Pet Accidents

 Warping

Repair Skill Level Required: Floor repair professional
Tools/Materials Needed:
If the warping is only minimal, dry the extra moisture out by using any of the following materials.
  • Heavy flat object (box, chest, weights, etc.) to flatten the warping until moisture dries
  • Dry towel and a good disinfectant cleaner to dry vacuum the warping
  • Electric fan to speed up drying process
  • Dehumidifier
Wood Warp

 Mold, Rot, And Odors

Repair Skill Level Required: Floor repair professional
Tools/Materials Needed:
Minor water damage to can be repaired by removing the water and slowly drying the boards using the following materials.
  • Shop vacuum
  • Squeegee
  • Stiff brush
  • Bucket
  • Rubber gloves
  • Absorbent cloth
  • Mild detergent or disinfectant
Wood Molds, Rots, and Odors

 Termite Damage

Repair Skill Level Required: Floor repair professional
Tools/Materials Needed:
You may have to remove all the wood panel affected or replace entirely the furniture.
Wood Termite Damage


What types of furniture can I use the kit for?

Coconix customers love this amazing kit because it is perfect to use on tables, chairs, wooden cabinets, bedframes, wooden headboards, shelves, storages, wooden trays, decors, and other wooden items.

What types of furniture can I use the kit for?

What types of wood can I use it to?

The wood repair kit can be used on any type of wooden floors or wooden piece of furniture—whether its hardwood like oak, hickory, teak, maple, beech, walnut, mahogany; or softwood like spruce, pine, and fur. Even engineered or manufactured woods like plywood, particleboard, or fiberboard can be repaired using our wood repair kit.