Repair guide
How to repair a frayed carpet edge?
A frayed carpet edge can be repaired when the section can remain flat and secure. The Coconix Fabric & Carpet Repair Kit uses supplied backing fabric where support is missing, fabric adhesive within the damaged edge and matching repair fibers to rebuild loose or missing pile.
Block traffic and inspect the nearby binding, doorway, transition strip or stair nosing before trimming only unstable strands. Dry-fit the support so the repair stays level with the surrounding carpet and hard floor. Choose professional flooring repair for loose carpet across a wider area, wet or contaminated underlay, a failed transition or long binding section, damaged stair nosing, broad deterioration or any remaining trip hazard. Keep people, pets, doors and vacuum heads away for at least 24 hours while the adhesive dries.
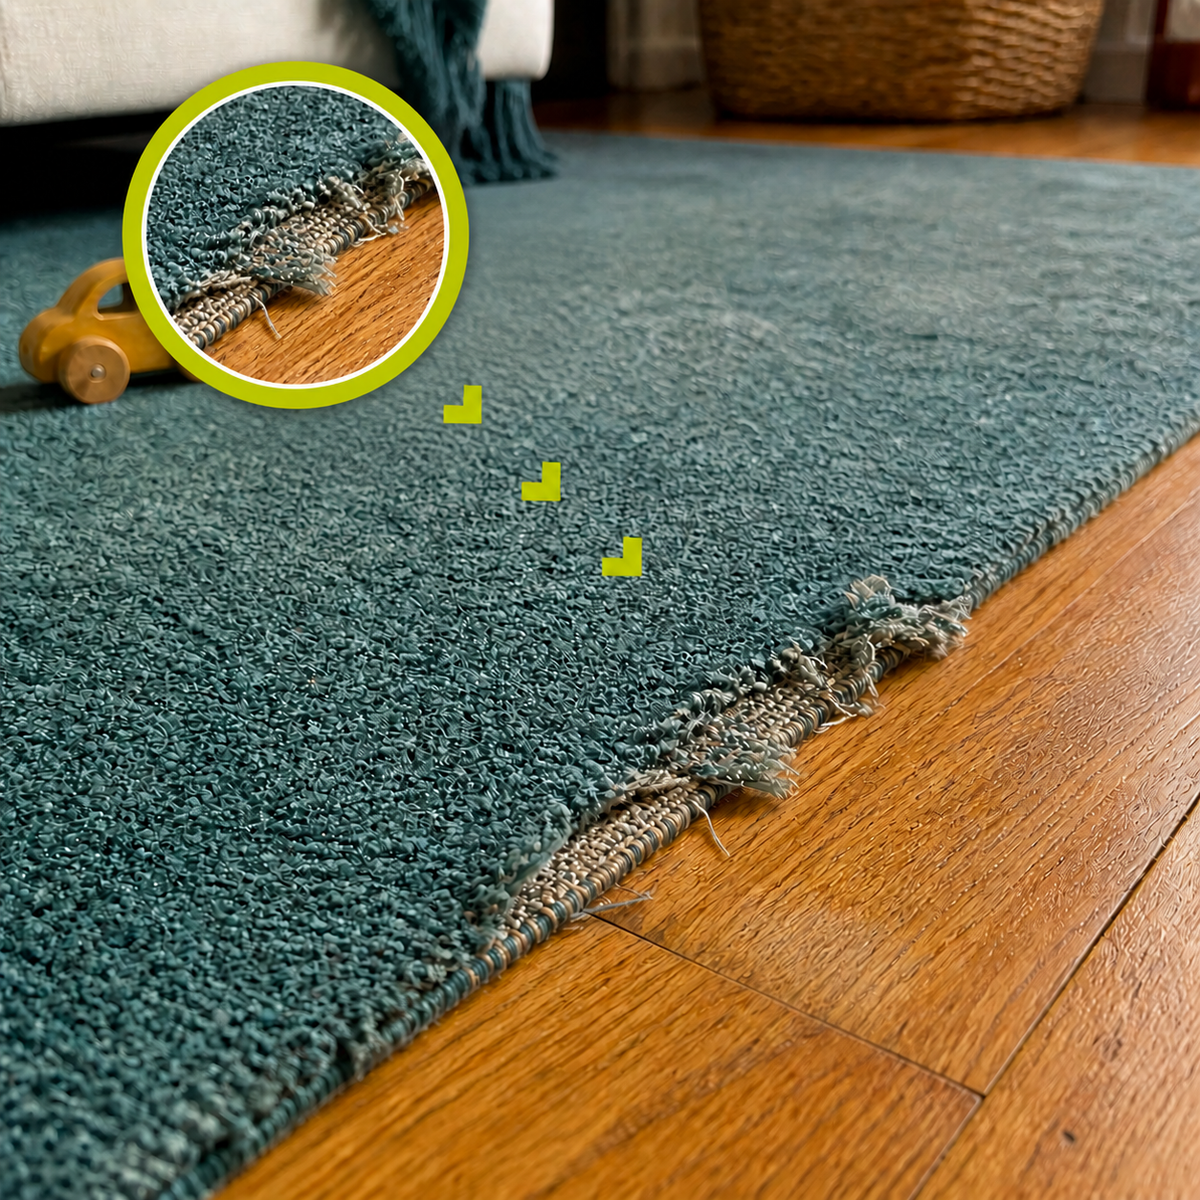
Repair at a glance: frayed edges on a carpet edge
- Material
- Carpet
- Damage
- frayed edges
- Item
- carpet edge
Repair cost
How much does it cost to repair frayed edges on a carpet edge?
Professional repair estimates by currency
USD
United States dollar
- Smaller repair$75–$200
- More extensive repair$250–$500
EUR
Euro
- Smaller repair€60–€170
- More extensive repair€210–€430
GBP
British pound
- Smaller repair£60–£150
- More extensive repair£200–£450
What does professional repair cost?
What does a DIY repair cost?
$19.95
The kit price shown here is live. One kit can often cover more than one small repair.
See the repair kitWhat changes the repair cost?
- The size, depth and severity of the damage
- The material and whether reinforcement is needed
- The color, grain, texture and finish-matching work
- Local labor rates and whether the item must be transported
Professional prices are indicative ranges from the approved article content and can vary by repairer, location and condition. Request a local quote for an exact comparison.
Difficulty
How difficult is it to repair frayed edges on a carpet edge?
Time required
How long does it take to repair frayed edges on a carpet edge?
When frayed edges on a carpet edge can be repaired at home
When to call a professional for frayed edges on a carpet edge
Prepare before you start
Materials needed to repair frayed edges on a carpet edge
-

Coconix Fabric & Carpet Repair Kits
-

Cleaning Solution
-

Cleaning Cloth
-

Cotton Balls (if padding is missing)
-

Scissors (if necessary)


Before repairing frayed edges on a carpet edge
Watch how to repair frayed edges on a carpet edge
The written procedure below covers the repair steps shown in the video.
Detailed procedure
How to repair frayed edges on a carpet edge: step by step
-

Step 1
Preparing the Area
- Inspect the worn area and remove only loose threads or unstable fibers; do not enlarge the thin patch.
- Clean the frayed edges and surrounding surface with a mild, material-compatible solution and a soft cloth, then let it dry completely.
- If the surface is sunken or missing padding, add a small, even amount of cotton wadding to restore a level base before applying adhesive.
-

Step 2
Using the Backing Fabric
- For an opening larger than about 1/4 inch (0.6 cm), cut a piece of backing fabric slightly larger than the damage and round its corners.
- Use the kit spatula to slide the backing beneath the frayed edges, keeping it flat and centered without stretching the surrounding fabric.
- Do not add backing to shallow surface damage that does not need additional support.
-

Step 3
Mixing the Repair Fibers
- Use the included Color Mixing Guide to select or create a fiber blend that matches the dry carpet edge.
- Place the selected fibers and metal mixing ball in the empty mixing jar, close it and shake until the colors are distributed evenly.
- Compare a small sample in the item’s normal lighting and adjust the blend before applying any adhesive.
-

Step 4
Applying the Fabric Glue
- Apply a controlled amount of fabric glue within the frayed edges, starting at the outside edge and working inward.
- Spread the adhesive into a thin, even layer that remains level with the surrounding surface.
- Keep glue off undamaged fibers and do not overfill the worn patch.
-

Step 5
Adding the Fibers
- Remove the metal mixing ball, stretch the mesh over the jar opening and secure it firmly with the rubber band.
- Hold the jar over the adhesive and tap it gently to sift matched fibers evenly across the glue.
- Add only enough fibers to cover the adhesive without creating a raised mound.
-

Step 6
Finishing Touches
- Press the fibers gently into the adhesive with the spatula and level the repair with the surrounding material.
- Follow any visible weave, line or pile direction so the matching kit fibers sit naturally.
- Leave the repair undisturbed for at least 24 hours. After the glue is completely dry, blow away or softly brush off only the loose excess fibers.


Protect the result
How to care for a carpet edge after repairing frayed edges
- After the repair has dried completely, remove dust with gentle vacuuming or a soft brush.
- Reduce friction, pet scratching and concentrated wear over the repaired area whenever practical.
- Avoid soaking, harsh chemicals, abrasive cleaners, high heat and rough scrubbing tools.
- Inspect the repair regularly and stop using the item if the surrounding fabric, backing, edge or structural support begins to fail.
Aftercare
Troubleshooting
Why does a fabric or carpet repair look patchy or a different shade?
The mixed-fiber ratio is off, loose excess fibers remain, the pile or weave faces a different direction, the fiber density is uneven, or adhesive is showing through.
Use the included Color Mixing Guide, prepare the fibers in the empty mixing jar with the metal mixing ball and shake thoroughly. Compare a small dry sample in normal lighting before adding adhesive. For an existing dry repair, remove only loose excess fibers; align the visible fibers with the surrounding pile or weave and make only the smallest damage-specific correction shown in the matching Coconix How-to.
Why does a fabric or carpet repair edge feel stiff or remain visible?
Excess adhesive, a thick repair boundary, uneven backing or fill, too many surface fibers, exposed adhesive, or pile facing away from the surrounding material.
After full drying, blow away or softly brush only loose excess fibers. Do not add more adhesive to a hard raised edge. If the edge is flexible but visible, correct only the mismatch: remix the fiber shade, align the pile or weave, or use the matching damage guide to level the smallest affected boundary. For the next application, keep adhesive inside the damage, build coverage gradually and level fibers with the surrounding surface.
What should I do if a fabric tear or carpet hole reopens?
The backing did not support the complete opening, localized fill remained low, the surface was used before the adhesive cured, or tension, abrasion or pet activity continued at the same spot.
Take tension off the area and inspect the fibers, backing and localized fill. Remove only loose or unstable threads, clean and dry the area, restore missing localized fill with cotton wadding where needed, place the supplied backing beneath the complete opening and follow the exact tear-or-hole How-to. Keep people, pets, friction and vacuuming away for at least 24 hours while the adhesive dries.
Use specialist repair when the damage crosses a vehicle airbag seam or restraint component, involves a failed furniture frame or mechanism, contains broad contamination, or sits in a large high-tension area that continues pulling apart.
Why does a repair stand out after it dries?
Color, surface level, edge transition or material detail differs from the surrounding area, even if the other three are correct.
View the fully dry repair from normal distance and light, then check color, level, edge and texture separately. Correct only the failed check with the matching Coconix How-to: adjust and dry-test the mix for color, level only where the approved method permits, keep the blend boundary small, or restore the material-specific grain, pile, weave or texture.
Frequently asked questions
Can the Fabric & Carpet Repair Kit repair carpet backing as well as fibers?
What carpet and rug damage can the Coconix Fabric & Carpet Repair Kit repair?
Should I judge a Coconix repair color while it is wet or dry?
Why is drying time part of a successful Coconix repair?
Customer repair story
Saved Me From Replacing the Whole Carpet!
We were on the verge of replacing a very expensive wool carpet because of fraying at the edges. I decided to try Coconix as a last resort, and wow, what a difference! It took a bit of patience to apply the adhesive and secure the edges, but now the fraying is completely gone. The carpet feels sturdy again, even in the high-traffic hallway. Honestly, I don’t know why I didn’t try this sooner—it saved us thousands!
Individual repair results vary with the damage, material, preparation and application.
Recommended for this method
Best Coconix kit to repair frayed edges on a carpet edge

Fabric & Carpet Repair Kit - Mix & Match Any Color
$19.95
Repair textile damage with matching fibers instead of replacing the item. The Coconix Fabric & Carpet Repair Kit combines backing fabric, fabric glue and blendable fibers to mend...
More repair possibilities