
Leather Care PRO ultimate guide
The Ultimate Guide to Leather and Vinyl Car Interior Repair
- Product families
- Leather Care PRO
- Designed for
- Car ownersDIY beginnersLeather and vinyl care enthusiasts

Quick answer
What this guide will help you do
- Identify leather or vinyl, the vehicle part, and the full depth of the damage before choosing a method.
- Match scratches, cracks, tears, burns, holes, peeling, stains, and worn color to the closest repair guide.
- Keep airbag seams, controls, seat structures, and other safety-related components outside a cosmetic repair.
- Test color in the vehicle’s normal lighting and allow every repair layer to dry as directed.
Start here
Understand leather and vinyl car-interior damage before choosing a repair
Car-interior repair starts by identifying the material, vehicle part, damage depth and any safety-sensitive components.

Visual identification
Identify leather and vinyl car-interior damage by type and location
Compare the damaged part, edge shape and material loss with the examples below.
Scratches, scuffs and worn finish
Surface wear and color loss
Open or missing material
Cracks, tears, burns and holes
Specialist assessment
Safety-sensitive components
Make the right call
Should you repair your car leather yourself?
Match your expectations, the damage, and the time available before choosing a repair path.
Cost and route comparison
How much does leather and vinyl car-interior repair cost?
A compatible localized DIY repair can start with one $19.95 Coconix kit. Linked guides show representative professional ranges of $75–$1,200, €65–€1,030 and £60–£900, depending on scope.
DIY route
DIY localized repair with a Coconix kit
- USD
- $19.95
- Best for
- Stable, compatible localized damage with enough time for preparation, color matching, layering and drying.
- Time or difficulty
- Usually one repair session plus drying time; difficulty depends on material, depth, pattern and location.
- Tradeoffs
- Lower cash outlay, but the user controls diagnosis, preparation, color, texture and the final finish.
Current Coconix store price for one compatible repair kit before shipping and taxes; one kit can support multiple small repairs.
Professional route
Professional repair service
- USD
- $75–$1,200
- EUR
- €65–€1,030
- GBP
- £60–£900
- Best for
- Broad damage, safety-sensitive locations, failed structure, active moisture or movement, or results where specialist matching is essential.
- Time or difficulty
- Scheduling and service time vary by scope; refinishing, replacement parts or structural work can extend the project.
- Tradeoffs
- Higher cash outlay, but professional tools and experience can be valuable for complex or high-risk work.
Planning range compiled from the professional-cost ranges in this guide’s linked Coconix How-To articles; local quotes vary with scope, access, material and structural work.
Benefit
Learn a new repair skill
Benefit
Save money
Tradeoff
Time and effort are required
Tradeoff
Repair results vary
Product guide
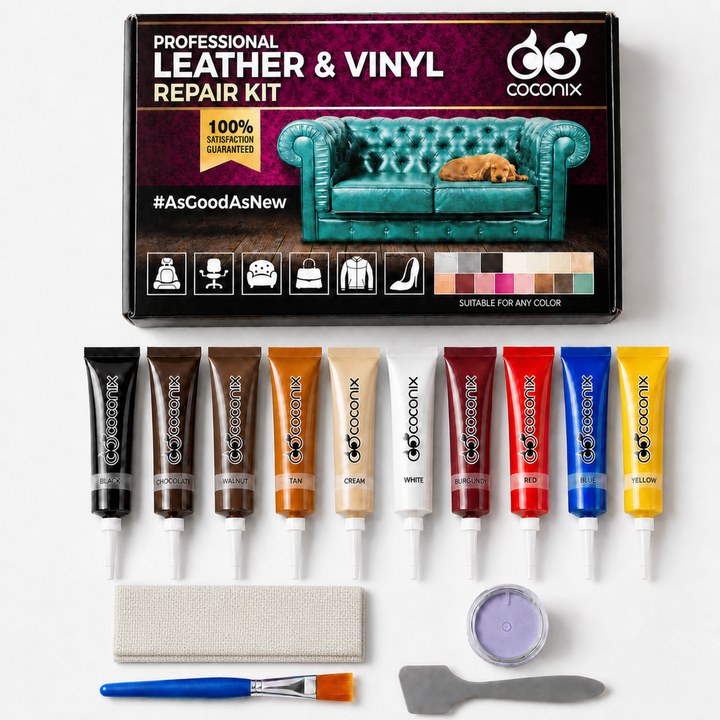
Choose the Coconix product for leather and vinyl car-interior damage
The Leather & Vinyl Repair Kit is the primary system for compatible localized car-interior damage.

Damage-specific repair guides
Find the right leather or vinyl car-interior repair guide
Choose the detailed guide by the car part, material, and damage instead of combining instructions from unrelated repairs.


Quality check
How to evaluate a leather or vinyl car-interior repair
Judge the dry result in normal vehicle light and through the part’s normal movement.
Troubleshooting
Troubleshoot leather and vinyl car-interior repair problems
Identify whether the issue is color, edge transition, texture, movement or repair scope before changing the area.
Why does a leather or vinyl repair look too light, dark or flat?
- Likely cause
- The mix was judged while wet, the undertone differs, the compound layer is too thick, the lighting changed, or the surrounding grain was not recreated.
- What to do
- Compare a thin, fully dry test beside undamaged leather or vinyl in normal-use light. Adjust one color at a time, mix thoroughly and dry-test again. Apply only thin layers and let each dry fully; recreate the surrounding texture while the final layer is semi-dry, then blend the fully dried edge as shown in the matching Coconix method.
Why is the edge or texture of a leather or vinyl repair still visible?
- Likely cause
- Compound was applied too thickly, the opening or groove was not leveled in thin layers, the blend ended abruptly, or texture was not recreated while the final layer was semi-dry.
- What to do
- Use the damage-specific Coconix method on the smallest affected area. Build a low spot with thin layers, letting each layer dry fully. Avoid adding more material to a ridge; compare the cured edge with the official blending step before reworking it. For a smooth patch, recreate the surrounding texture while the final corrective layer is semi-dry, then blend only the fully dried boundary.
What should I do if leather or vinyl damage reopens or peeling continues?
- Likely cause
- The opening lacked support, the compound was built too thickly or used before fully dry, repeated flexing or abrasion is stressing the spot, or the surrounding coating is failing beyond a localized repair.
- What to do
- Clean and dry the complete area, inspect it while the item moves normally and choose the matching route. For an opened cut or tear, use the kit’s backed-opening method and thin compound layers. For localized stable peeling, remove only fully detached fragments and use the repair method. For broad stable coating loss, prepare and recolor the larger continuous area with the Balm method so isolated patches do not keep appearing.
- Stop or get help when
- Use specialist upholstery repair for airbag seams, restraint or electrical components, failed load-bearing seams, damaged frames or mechanisms, major contaminated foam loss, or leather or vinyl that keeps splitting or crumbling beyond the repair area.
Customer repairs
Leather and vinyl car-interior repair results
These customer before-and-after images show the types of leather and vinyl damage the repair system can address.

Burns and holes

Scratches and cracks

Cuts, rips and tears
Care and prevention
Protect the repaired car interior
Reduce renewed wear by controlling friction, heat, sunlight, dirt, and sharp contact around the repaired area.
Coconix repair solutions
Products featured in this guide
Match the product to the material, damage and size of the repair.
Clear answers
The Ultimate Guide to Leather and Vinyl Car Interior Repair: frequently asked questions
Can Coconix repair leather and vinyl car-interior damage?
When should car-interior damage go to a specialist?
Continue learning
